Monday, April 18, 2011

#22 Zombie Bunny

I don't know why I did this. 


I saw this idea as an April fools joke and wanted a real one.
Since I had all the supplies on hand, it was a no brainer!

It's happening!


I already had the mold for a chocolate bunny along with my many other candy molds.


You can buy bunny molds online or at a local cake supply store. 
Mine is kind of big almost 10" tall! 
I would suggest going for a small mold if you are starting out in candy making.
 Plus this guy uses alot of chocolate!


I used just plain old candy melts, they sell them every where. 

I used red, white, green, and yellow.
They are super easy to use you just microwave them and remicrowave them as needed.
Tempering real chocolate is an art form.
This is just way simple, and you have all the colors ready.


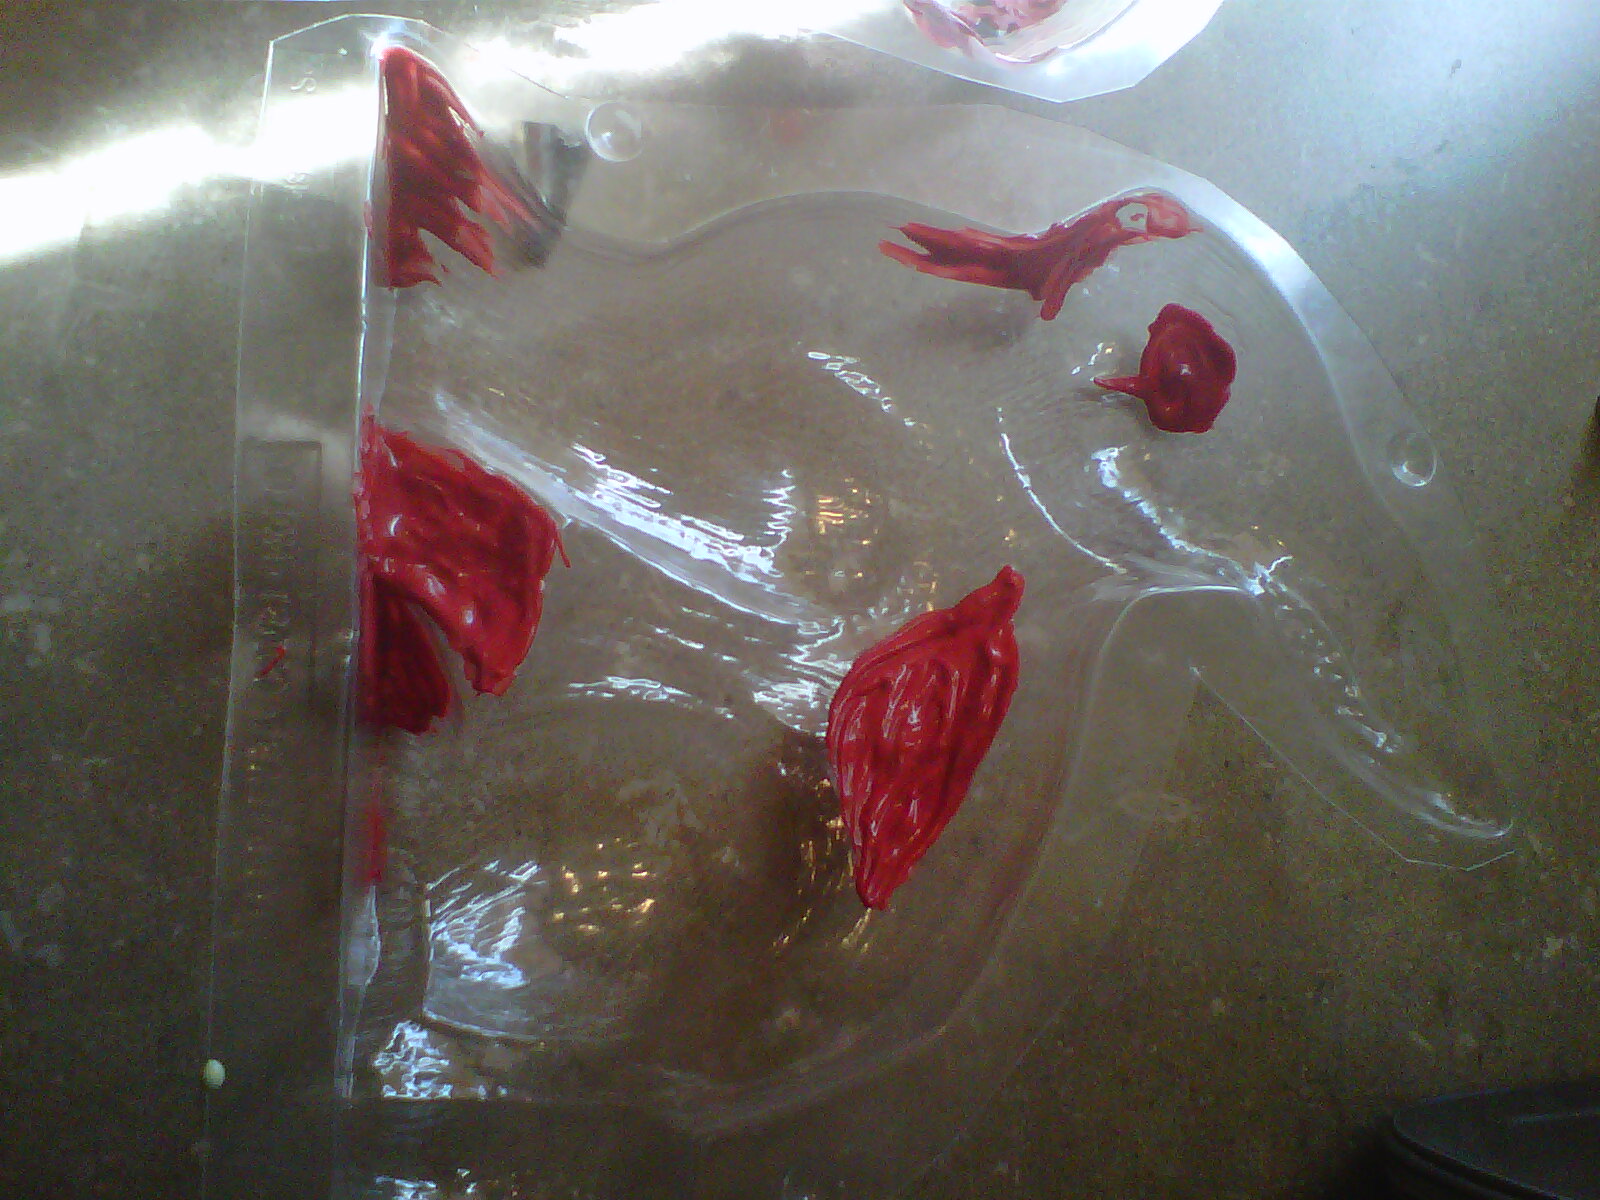
I started by doing the blood stains with a brush. I froze it and let those dry.


Using two whole yellow candy pieces, I cut out bulging eyes. 
For my bunny the back of a piping tip made the perfet size.


 I piped red pupils and stuck them in the freezer.


I made a zombie green with a mixture of all the chips (even just a couple of the red). 
I just kept experimenting until I liked the color.


I painted a nice thick layer of the green in my mold getting in all the cracks. 
Then I poured more melted candy in and sealed my two sides together and moved it around to get an even coat on the inside. Then let it set in the freezer


After it set I popped it out of the mold and trimmed and cleaned up all the seems.


I reheat my red candy and added more details.


I used it to stick on his eyes and add more 3D blood drips


I used a little white and brushed on fangs......

and some ribs!


I just played around with the red until i felt satisfied.


It is really tempting to go nuts with the blood but a little goes a long way.


He will look adorable in someones easter basket.

Happy Easter!


                               Or just get a mold and make an army of zombie bunnies!


Wednesday, March 30, 2011

#21 Scorpion Orchid


I had made this tutorial a while back and just forgot to post it. 
It's another of my Fearsome Foliage. 


Yes I know.... another plant! 
But you know witches have a lot of weird stuff in their garden.


There is a real flower called the Scorpion Orchid but what I had in mind was a bit more literal.


I again used "Creative Paper Clay" because this needs to be extremely light as not to weigh down the delicate silk plant. Paper clay is the perfect choice here. 


So I am making a super light weight yet long scorpion tail.

I rolled little cylinders of the clay and pushed them on just regular floral wire approximately 3 to 4 inch length.


When I had the amount I wanted I smoothed and evened it all out. Then I curved the wire like a scorpions tail and defined or added more joints as needed.


 For the stinger tip just a little ball of clay.....


...gently rolled one end.....


...to a point......


..and stuck it on the end of the tail.


Let it dry completely.


For the claw like stamens, you could just curl some extra stem pieces from a silk flower.


Or I found these claw like pieces inside a plant I had, and just bent them into curves.


The flower was just a simple dollar store orchid. I manipulated it slightly. 

Since this was only an experiment I went cheap, but I will likely try this with a nicer silk orchid next time.


With Hot glue I attached the tail to the back of the flower. I also glued between the joints of the tail that didn't stick to each other, and hot glued the stamens in the front center of the flower.


I painted the tail black and added some brown highlights. I also painted the stamens and flower center and used water down black paint to stain the petals and leaves.


And there you have it .


Tuesday, March 15, 2011

#20 And The Award Goes To....


 At Halloween I like to have a big party.
So every year I need some new best costume awards.

A little hot glue, some gold spray paint, and dollar skeletons that have been in a tote since last year.....

 have finally found a purpose.


He is holding just a wooden dowel. I will likely add a clay pumpkin topper


In case you are new to my blog you may have noticed I have a Dollar Store addiction. I sometimes buy things there with no idea exactly what I will do with them but I just know there is some potential. 

So yes, I mindlessly spend money on things there all the time. Suze Orman would be yelling at me now.


Anyway here they are the little 12" skellis from Dollar Tree. They are floppy jointed kooky little guys. Something comic about them attracted me and the fact that I could get so many. So I bought them almost two years ago but they have them every year it seems.


Note get em early this is something that will sell out. If you are dollar store shopper you know, buy Halloween in August.... Christmas in October etc.


Found these little plaques in different shapes at Michael's craft store. They ranged from fifty cents to a dollar.


So using my trusty Hot Glue Gun I start at the feet and work up. I broke the limbs and glued them back on in the pose I wanted. That gives them a little more range of movement.


I plan on making these into best costume awards so I posed some appropriately.


See bellow "Funniest" and "Sexiest"

I clipped there little hanging loops of their heads as well.


I played a round with them. I was thinking these would be fun over the kitchen cabinets as well.

Just some skeletons having a good time. Oh you could add accessories like a little apron, and chef hat, a mini wine glass. a little feather boa.... OMG! Cute potential!


#19 Scary Fish

I have a plan to turn a space in my house into the sporting trophy room of the bravest monster hunter in the world! 

Now who you may ask, is this strange person who has traveled the world to dark places in search of the most deadly,  most exotic, and most formidable prey? 

I don't know, but he or she kicks ass!


The first most common trophy I thought of was a fish.... 
a Big Scary Fish!


There are quite a few Papier Mache artists out there that I admire. I think The one I have admired for the longest Is Dan 'the Monster Man' Reeder. 


I had just recently bought his book 'Monsters' and he had an amazing set of fish in there.
 I also want to try one of his dragon trophies (that would fit in the room as well )

I highly recommend the book! 
It has detail instructions, very easy to follow. His blog is also great.
 He is always willing to answer any questions you have.


So since this is his method I won't add the instructions just a few progress pics.


You will need a lot of newspaper!


I wanted to try a couple different things in his book (definitely a couple monsters) so I spent an afternoon just making papier mache limbs and balls per the instructions. Here are the balls drying outside in the perfect dry Arizona sun. Here papier mache is ready by the next day, if you remember to turn it mid day.


I used one big ball for the body, a medium ball for the head, and a few smaller ones for the tail gill and fin spots. Oh and a lot of masking tape.


Teeth are Fimo. Fins are coat hangers, tape, and phone book paper. Again, Dan has detailed instructions for all this on his blog and in his books.


I decided to use red gems for his eyes. You know, those bags that come in every color in the craft floral section. I had a bunch of these, but you can also order some pretty cool fish eyes online. Or make some out of clay.


Here is the beginning of Dan Reeder's signature Cloth Mache Skin, I am pretty sure he invented this method.

It is a super cool effect. The stickiness is something to get used to though. You need a lot of elmers glue and old bed sheets. 

Good Will is a good place for the sheets.

But it just so happens my bed sheets developed a tear right as I was getting to this part, such wonderful Luck! Also interestingly enough, the pretty new sheets I've been  wanting to buy were on sale that week! It's amazing how it all worked out.

Although My husband seems very suspicious of me, I swear it was all just fantastic coincidence!


More fins and then the scales. This is the messy fun part were you start to see your work come together. This part took a couple days just because the fins need to dry over night before you move to the next step and I could only take sticking my hands in the elmers glue for a couple hours at a time.


Here are all his scales gills all of its done and dry.
The different colors are just my different colored sheets.


I used some green house paint I had leftover for his base and black for the inside of his mouth. Then I did the black wash that Dan does, it really makes the colors pop!


And then i added highlights in yellows and blues.

All in all it takes one afternoon making the mache balls then a couple for them to dry.
An afternoon of cutting balls, taping, adding teeth eyes, fin bones.
Webbing about and hour but has to dry over night.
the skin scales you could probably do one side a day so about 3 afternoons.
And painting one day.


I plan to mount him on the wall. 

He is pretty light weight about 2 ft long. 
Now I want to make a giant shark!

Ok maybe I will wait a bit on that one. But it would be sweet wouldn't it?